

Top Common Problems A Solar Inverter Can Face
July 6, 2021Difference Between an On-Grid & Off-Grid Solar Panel System
June 26, 2021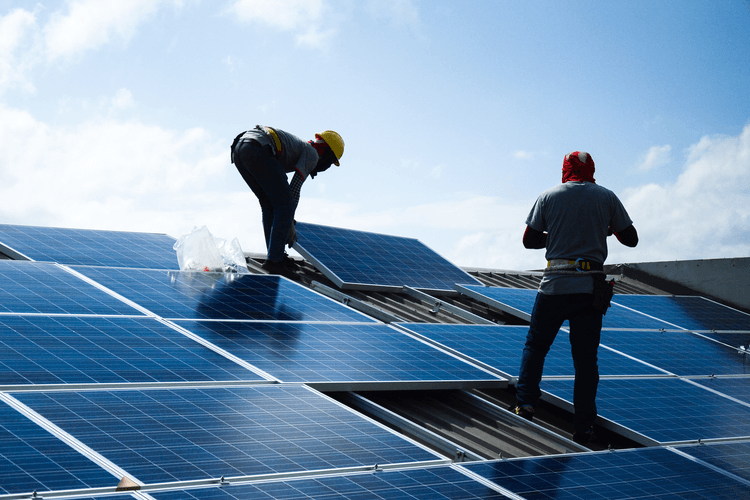
As science is progressing, the ways of attaining electrical powers are likewise moving up—the typical procedures of getting connections from power firms are hassling because of hefty bills. The solar panel system has more perks as other than setting up cost, and tiny maintenance, you won’t be getting any monthly bills. Here, we have explained the right way of installing solar panels in the place.
Components of a Solar Panel System
Before getting on to the procedure, let’s take a look at the essential components that are required for the whole setup. These are;
- Solar Panels: They are the most significant part being responsible for the conversion of sunlight into electricity—the photovoltaic effect. Their output ratings are measured in watts (that is the maximum energy produced by the panel under ideal conditions). Some of the finest solar panels.
- Mounting Racks: The photovoltaic plates (solar panels) need some support to get settled together on the roof or anywhere—the mounting racks hold them and being fixed so that they can subtly capture rays.
- Solar Inverter: The electrical energy created by the solar plates is in the form of direct current that cannot be consumed to operate the standard home appliances. The solar inverters convert the DC power into the alternating current (AC) that is used by the appliances. Here, we have stationed the best solar inverters in Pakistan.
- Battery: For the solar panels to generate power when the sun is shining/during day time—but what about when there will be clouds or in the night? Here, the batteries are the solution. They store electricity and can be consumed when needed.
- Meters: In order to maintain the tie up of the all the components of the solar panel system—i.e., the power meter keeps a check of power being generated by the panels.
- Backup Generators: As if you are totally going to rely on the solar panels then there can be days where sun wont shine that well (depending on your area) or rains—thus, for those situations, make sure to have some backups. The power generators that operate on fossil fuels can be handy.
- Breakers: In case of any emergency, the short circuits or burns, appliances or the solar PV system can take the damage. The circuit breakers are essentials, they switch off or trip the electric flow.
- Charge Controllers: these are responsible for the regularity in charging of the batteries. In cases, where no charger regulators/controllers are installed, the batteries can receive damage. Might because of over-charging, or sudden increase in voltages.
Related Articles: Best Solar Inverter in 2017
How to Install Solar Panel System?
Now that we have known the components essential in the solar panel system—getting on to procedure of how to install the solar panel system. The ac power generated by the PV system should not face any discrepancy, thus, follow the procedure;
Prepping the Place for Solar Panel System
Whether it is, you think the appropriate place for installing the solar panels is the roof, ground, terrace, or anywhere else—there are some factors need to consider while selecting the spot;
- The area where photovoltaic plates are ought to be installed should attain the maximum sunlight coverage.
- No water should be gathered on the surface (drainage should work).
- If you are surrounded by buildings, make sure to select the roof because of exposure to sun.
- Check the angles of sun rising and settings at the spot.
After selecting the spot, clean the place, remove any nest or hives nearby, otherwise these can inhabit under the solar panels too.
Installing the Mount Racks
Prepare a proper space for the solar panels, do the math of how much panels can be installed by acquiring how much space. Make sure to figure out the length and width of panels and then install the platform (mount racks) accordingly.
- Use brackets, bolts, or clamps to fix the panels accordingly.
- For the mounting racks, prefer aluminum rails rather than metal.
- Make sure the platform is firm enough to tolerate seismic waves.
Leave some space from the ground to the height of panel for air to circulate—this will prevent overheating of PV plates.
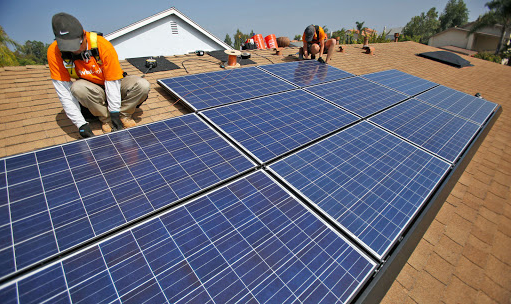
Mount the Panels
The racks are responsible of holding the solar panels—after preparing the platform, start to put together panels.
- Slowly place it over the rack.
- Fix them accordingly.
- Make sure to keep the wiring not tangled up, but organized accordingly.
- Safety is first, so gather some extra help if the panels are too heavy or the angle is too steep.
- Most of the 24-volt 110 watt PV panels are pre-fastened for the array, thus no hassle of fastening.
Do the Wiring
After placing the photovoltaic plates properly—now, is the time to wire the solar modules. Join them at a junction connector (fuse combiner box). Keep a checklist of few factors while wiring;
- Insulation of the wires is properly done.
- Make sure there is no power leakage due to any reason.
- They are not tangled, keep them organized and in a proper manner.
- Check the connectors and validate they are well inserted.
The connection must be in a manner that it flows to the charge controller then to the battery packs. In some cases, technicians prefer to flow the current to the solar inverters. The connection path totally depends on the type of solar power system used.
Mounting the System
As the solar plates are fixed on the spot, the wiring has done, now is the time to do the work under shelter;
- Place the battery packs, solar inverter and circuit breakers.
- Connect the junction to the solar inverter (or battery packs—depending on the solar inverter/panel type).
- Take a test run, check the status and make sure all the connections are proper.
Related: Get the best solar inverters & solar panel system to power up whole house.
Ground the Solar Panel System
After that you have connected all the components, grounding is the most essential thing to do right after. The electrical components might take damage because of lightnings. Grounding the components will direct the current down to the earth.
How to ground the solar panels?
- Use thick bare copper wire (handling large electrical current)
- Attach the wire to the clamps.
- Take a grounding rod and attach it to the wire.
- Wrap up the wire to the panel systems (most of the solar panel models have grounding screws—attach to it).
- Take the grounding rod and put it in the earth (at least six inches down)

